
The decision in brief
On a pin-bridge steel-string acoustic, check the string’s ball-end seating and the pin’s documented fit together. Do not secure a lifting pin by hammering it down. Martin and Taylor describe different fitting details, so a collar sitting flush is not a universal target. Match replacement pins to the actual guitar and leave uncertain or damaged holes for a repair assessment.
Separate the pin from the saddle
The bridge pin is part of the string-end retaining arrangement on the pin-bridge design discussed here. The saddle is the raised support the sounding string passes over. Moving a pin head is not the normal way to set that saddle’s height.
Follow the string across the saddle toward its anchor. A guitar with a tie block or a pinless bridge has another securing method. Start with the bridge overview if these parts are unfamiliar; do not apply a pin-bridge routine to every acoustic instrument.
A visible pin head also tells you little about the condition beneath the bridge. Keep observations such as “the pin rises as I bring this string up” separate from conclusions such as “the bridge plate is worn.” The second statement needs an actual inspection.
Check the ball end’s seating before adding tension
Taylor’s Ask Bob discussion explains that the string’s ball end belongs against the bridge plate under the top. Its contributors describe seating the ball clear of the pin’s end. A pin that is being pushed upward therefore calls for a seating check, rather than a stronger push on its head.
Use the instructions for the exact guitar when preparing and seating the compatible string. Loosen the string before removing or repositioning its pin. If the string end or the plate cannot be assessed confidently, stop the restringing job and have the arrangement checked.
A pin staying still under light handling does not establish that the ball is correctly seated. Conversely, a pin that feels loose with no string tension is not by itself proof of a defective hole. Taylor describes intentionally looser fitting in the instruments discussed. Its explanation is a design example, not permission to ignore an insecure string.
For the complete string-change sequence, use the hardware-specific restringing checklist. This page concentrates on the bridge end.
Sources: Taylor Wood & Steel, 2023 issue 1: Ask Bob on bridge-pin fit
Different makers describe different fitting details
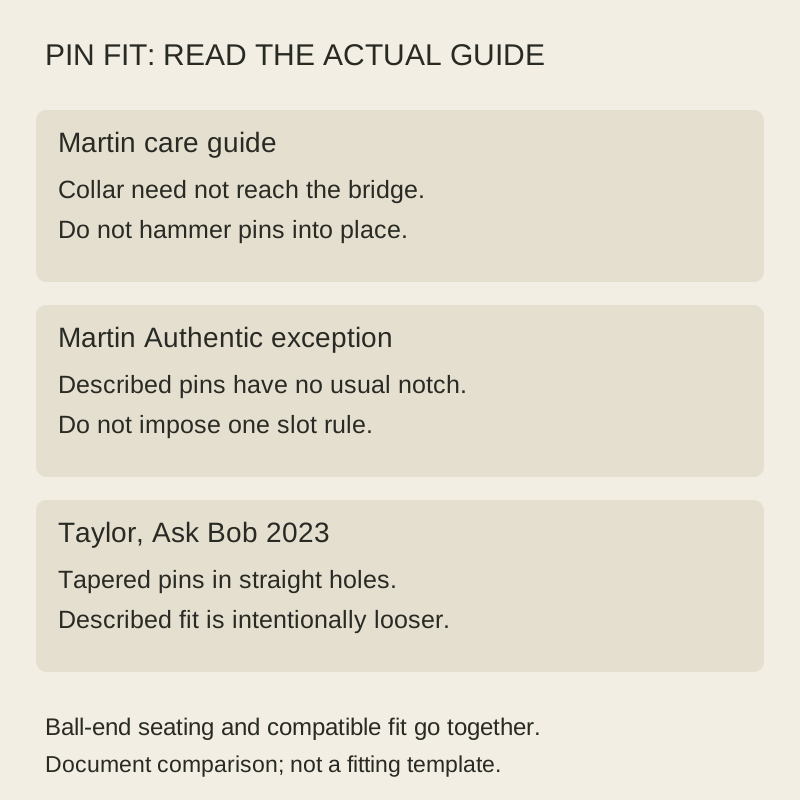
Martin’s hosted care guide says its bridge and endpins are tapered friction fits and are not designed to seat up to the collar. It warns that hammering pins can wedge them and split the bridge. The same section specifies a forward-facing slot for its described slotted pins and identifies an Authentic-model exception without that notch.
In Taylor’s 2023 discussion, the company describes tapered pins in straight holes and an intentionally looser fit intended to produce even seating. Bob Taylor also explains that slot orientation can vary with the string and slot. These statements concern the arrangements described in that discussion.
| Documented example | Detail to retain | Conclusion to avoid |
|---|---|---|
| Martin care guide | Tapered friction fit; collar need not reach the bridge | Every pin must be flush |
| Martin Authentic exception | Described pins lack the usual notch | Every pin must have a forward-facing slot |
| Taylor 2023 Ask Bob | Tapered pin, straight hole and a deliberately looser fit | Every loose unstrung pin needs a larger replacement |
The useful common point is secure, correctly seated string retention. The details are not interchangeable fitting targets. Obtain model-specific advice when a current or modified instrument does not match its documentation.
Sources: Martin Care & Feeding Guide: bridge-pin seating and Authentic exception (printed p. 5); Taylor Wood & Steel, 2023 issue 1: Ask Bob on bridge-pin fit
Choose a replacement by fit before material
A matching colour or “acoustic guitar” label does not establish compatibility. Start with the guitar’s model, year or version where known, and the maker’s approved replacement part. Keep a photograph of the original arrangement and identify any earlier repair or modification.
If a supplier offers dimensional drawings, compare like reference points: shaft diameter at a stated position, taper, working length, and slot or unslotted design. A diameter without its measurement position is incomplete on a tapered part. Do not guess a replacement from the head’s diameter alone.
Use the supported string type and gauge as part of the fit question. A changed string and an unfamiliar pin make two changes to assess. Resolve their compatibility before installation. The acoustic string guide addresses the set; this article does not approve a larger string by changing the pin.
There is no material listening test in this article. A replacement sold as bone, wood or synthetic material is not evidence that it will improve this guitar’s sustain or balance. Correct retention and an assessed fit come before a sound preference.
Describe a rising, stuck or rattling pin accurately
| What you observe | What to record | Appropriate next step |
|---|---|---|
| Pin rises while tuning | String, new or reused pin, string change and when movement begins | Reduce tension and reassess seating with the model instructions |
| Pin will not release after slackening | Which pin, visible damage and removal tool already used | Stop before prying on the bridge; seek a repair assessment |
| Rattle near the bridge | When it occurs, which strings and whether a string change preceded it | Record the sound and have the actual source located |
| Crack, lifting bridge or uncertain hole | Clear photograph and instrument identity | Pause string work and arrange an inspection |
These are observation prompts, not remote diagnoses. A nearby rattle does not prove that the pin material is responsible. Do not glue, hammer, sand or ream parts to cure an unidentified problem. Repairing the bridge or plate is a different job from replacing a compatible service part.
If the complaint is fretting effort or buzzing rather than string-end retention, record it separately and read the action explanation. Pin-head height is not an action measurement.
Keep a bridge-end record with the guitar
For the next string change, retain the approved pin identity, string set, fitting instructions and any technician’s findings. Note whether the guitar contains the original parts. That record is more useful than a universal pin size copied from another instrument.
After an instructed, compatible installation, bring the guitar to its supported tuning while watching for unexpected movement. Stop if the seating is uncertain. A proposed owner check is not proof of long-term stability, and this article reports no completed installation.
Once retention is settled, assess normal playing and tuning separately. If the new parts were selected only for appearance, record that aim honestly; there is no need to add an unsupported tonal claim.
How this guide was prepared
We read Martin’s hosted Care & Feeding Guide, printed page 5, and Taylor’s 2023 issue 1 Ask Bob discussion on November 1, 2026. Their fitting descriptions are attributed examples, not one procedure for all acoustic guitars or all current models. The compatibility record and observation sequence are editorial guidance. We removed no pins, inspected no bridge plates and performed no material or sound tests. The diagram compares document instructions; it is not a scaled cross-section or a service specification.
Documentation checked .