The decision in brief
A full guitar capo holds all intended strings against a chosen fret, raising the sounding pitch of familiar shapes. Match its bar to the string span, fingerboard curve and neck clearance at the frets you use. Set it just behind the fret on the headstock side, with enough pressure for clear notes, then check the capoed target pitches. If notes buzz or sharpen, release it and check placement, contact and pressure before changing the guitar’s setup.
What a capo does—and does not do
A full capo presses the strings against a fret. That fret supplies the open-string contact point for the capoed playing area. In a conventional twelve-tone equal-tempered layout, each fret raises the intended pitch by one semitone. Real strings and clamp pressure can still produce pitch error.
Fender’s movable-nut analogy describes that new contact point. The original nut still guides the strings toward the headstock; the capo does not supply its string-spacing slots or repair the instrument’s intonation. A partial capo intentionally covers selected strings and therefore needs its own fingering and tuning plan.
Sources: Fender: capo function, mechanisms and partial capos
Understand shapes, sounding chords and keys
In standard tuning, a full capo at fret 2 makes a G-major shape sound as A major. The shape name tells the guitarist the fingering; the sounding chord tells the rest of the ensemble what is heard. Specify both on a chart, for example “capo 2, G shapes; sounds in A.”
| Shape played relative to a full capo | Capo 0 | Capo 2 |
|---|---|---|
| G major | G major | A major |
| C major | C major | D major |
| D major | D major | E major |
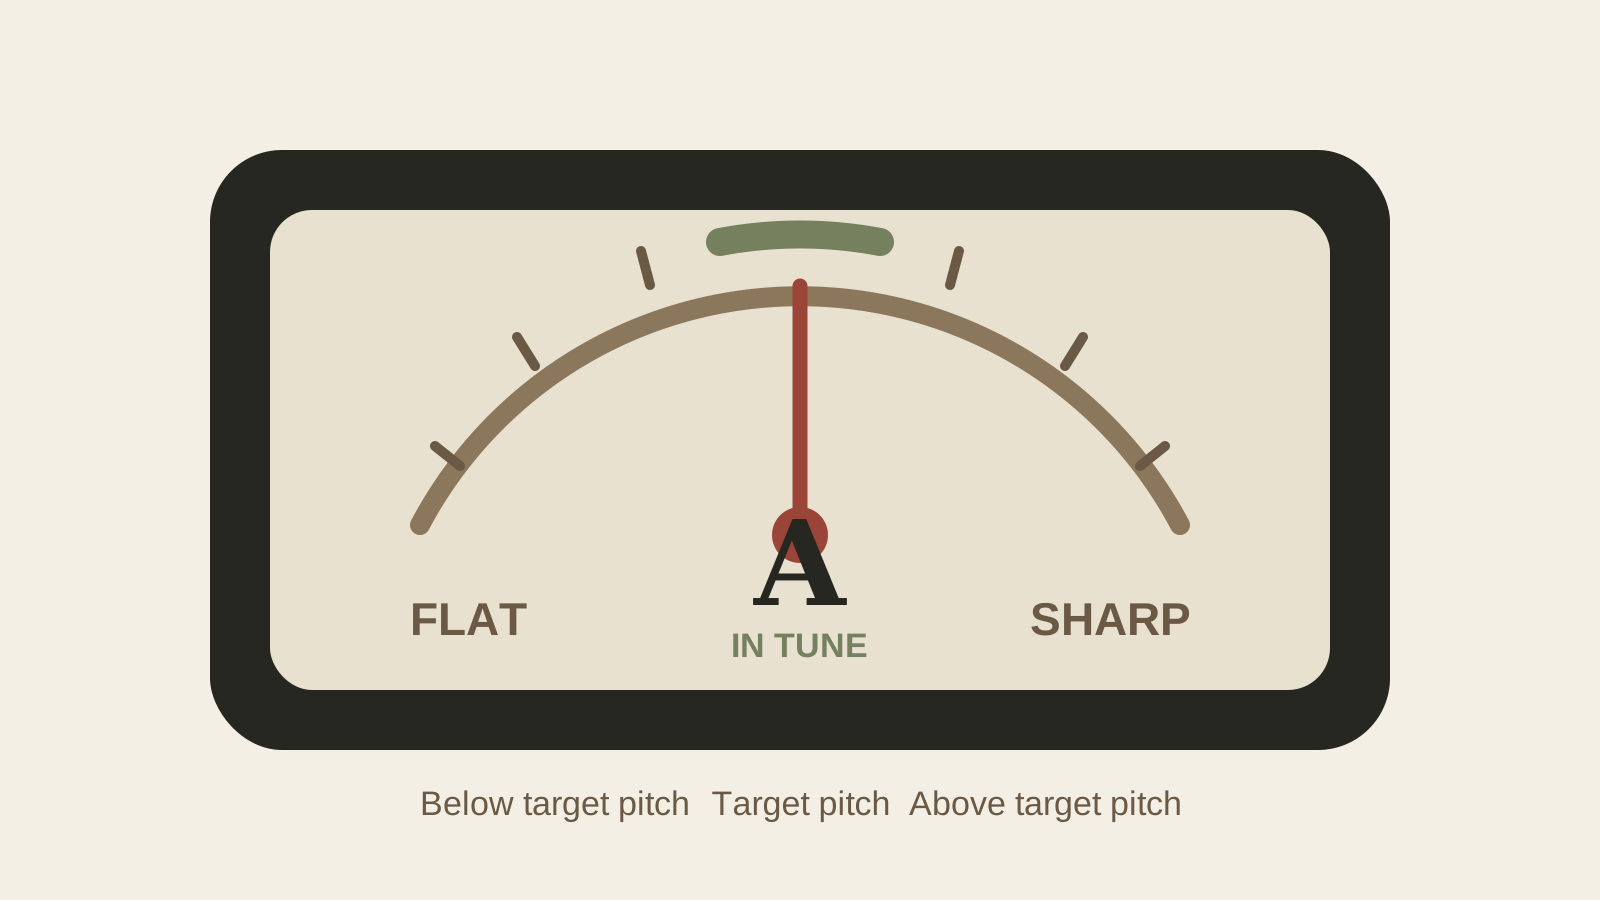
This is a transposition example, not a tuning measurement or a rule that every song suits that key. With the full capo at 2, an open E string’s intended note becomes F♯. Do not tune it back down to E simply because a guitar-only tuner mode expects an uncapped E. Use chromatic mode or a documented capo setting and confirm the correct target notes.
A partial capo leaves some strings uncapoed. It changes their relationships to the covered strings, so the simple whole-chord shift above does not automatically apply. Alternate tunings likewise require checking the starting notes before counting the fret shift.
Sources: Fender: capo function, mechanisms and partial capos
Compare the common capo mechanisms
| Mechanism | Adjustment to check | Practical trial |
|---|---|---|
| Fixed spring clamp | The applied force may be fixed | Can you fit and release it cleanly at the required positions? |
| Screw or yoke | Variable screw pressure and neck clearance | Can you set clear notes and reposition it at your playing pace? |
| Quick clamp with pressure adjustment | Check the exact model’s setting method | Does the quick action retain a useful pressure setting here? |
| Strap or toggle | Band/notch adjustment and condition | Does it close evenly and stay secure on this neck? |
| Partial capo | Which strings are intentionally covered | Do the resulting notes match the intended arrangement? |
These are mechanism families, not price or tuning rankings. Fender describes spring, screw, strap, toggle and partial forms; D’Addario explains the distinct application of trigger, screw and cradle designs. Follow the instructions for the actual model. A pressure control cannot make a bar long enough to reach a string it misses.
Sources: Fender: capo function, mechanisms and partial capos; D'Addario: placement and pressure for different capo mechanisms
Match the neck, fingerboard and strings
Check the span from the outermost intended string to the other at the highest fret you expect to capo. Separately check the neck width and depth against the opening and rear mechanism. Nut width alone cannot establish fit higher up a widening neck. Shubb explicitly makes this distinction in its sizing FAQ.
Match the bar/pad contour to the fingerboard curve as well. A soft pad may accommodate a range on a particular model; a “universal” label does not prove even contact on your guitar. Classical, twelve-string and extended-range instruments need their own width, curve and string-contact checks.
A compound fingerboard changes curvature along the neck. Try every position you need rather than checking only the first fret. The fingerboard-radius guide explains this separate geometry.
Sources: Shubb: string span, opening, radius and pressure are separate fit checks; G7th: classical fit and removing the capo when not in use
Place the capo cleanly behind the fret
- Tune the uncapoed guitar in your usual playing position.
- Choose the fret and confirm the intended sounding key and target notes.
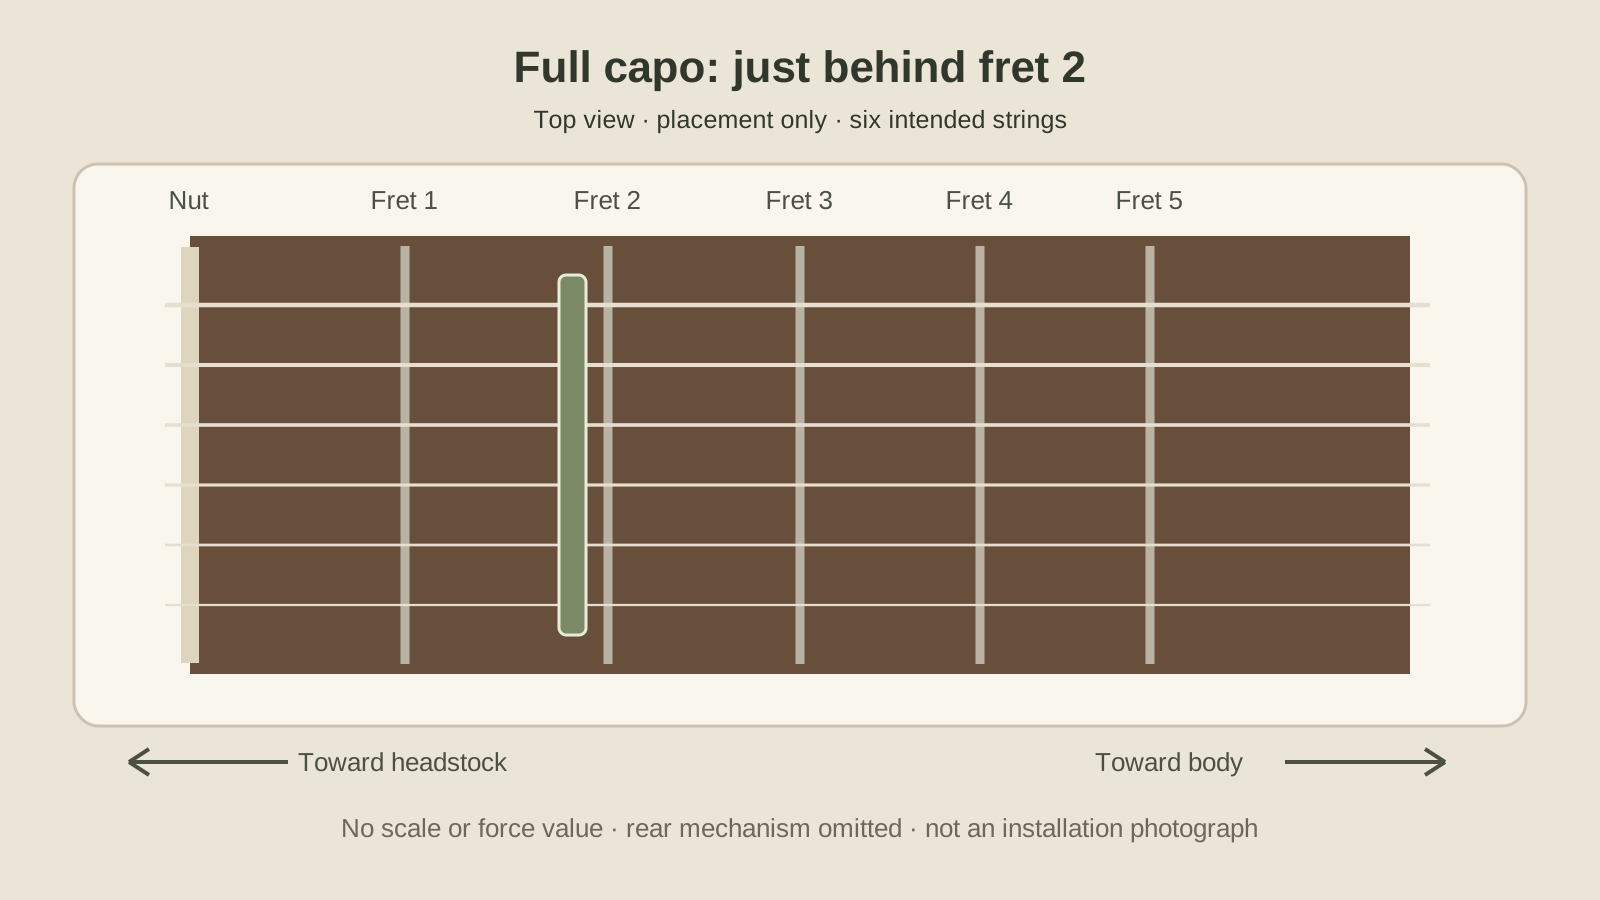
- Open the device fully. Position its padded bar parallel to and just behind the target fret, on the headstock side of the fret wire.
- Lower it onto the intended strings without dragging them sideways. Close it using the model’s method.
- On an adjustable design, use the least pressure that makes the notes clear. Release the mechanism before altering a setting if its instructions require it.
- Play each capoed open string, then your actual chord progression. Check the intended capoed pitches with a tuner.
D’Addario’s guidance supports proximity to the fret and appropriate pressure; Shubb also stresses direct placement without sideways displacement. The schematic shows location only. It does not specify a universal pad gap, force or three-dimensional mechanism.
Sources: D'Addario: placement and pressure for different capo mechanisms; Shubb: direct placement behind the fret without sideways string movement
Why a capo can make chords sound sharp
If the intended capoed notes are sharp, check whether placement or excess pressure is stretching the strings farther than necessary. Release and refit the device, then reduce adjustable pressure while retaining clear notes. If a fixed-pressure device continues to cause a repeatable problem, compare a suitable alternative on this guitar.
Once placement and fit are stable, make any necessary tuning correction for the performance with the capo fitted. Check again after removing it. Fender specifically recommends checks before, with and after capo use; that is not a promise that fitting a particular brand avoids retuning.
Keep the comparison useful: record the tuning reference and intended note, pluck normally and read the sustained pitch. A tuner reading alone cannot identify whether pressure, string movement, the nut or the existing setup caused an error. If fretted pitch is already inconsistent without the capo, use the intonation and setup guide.
Sources: Shubb: string span, opening, radius and pressure are separate fit checks; Fender: check tuning before, during and after capo use
Troubleshoot buzz, muted notes and uneven pressure
| Observation | First check | What the symptom does not prove |
|---|---|---|
| One capoed open string buzzes | Bar coverage, pad contact, placement and local fret/string condition | That more clamp force is always the answer |
| Several notes are muted | Release and refit; check contact with the fret and sideways string movement | That the string set is unsuitable |
| Strings buzz in the same area without the capo | Map string, fret and playing attack | That the capo caused the underlying problem |
| Only an intentionally uncovered string stays open | Confirm the partial-capo pattern | That a full capo is defective |
Repeat the same note after one change rather than tightening repeatedly. A damaged pad or exposed rough contact needs attention before further use. For symptoms that remain without the accessory, the fret-buzz guide provides an observation map rather than a remote repair diagnosis.
Sources: D'Addario: placement and pressure for different capo mechanisms; Shubb: direct placement behind the fret without sideways string movement
Acoustic, electric and classical differences
Acoustic and electric category labels are only a starting point. The specific string span, fingerboard curve, neck shape, fret height and setup determine whether a device works. Do not prescribe more pressure to every acoustic or less to every electric.
Many classical guitars have wider, flatter fingerboards; G7th documents dedicated classical designs for that geometry. On twelve-string instruments, test every member of each pair. For seven-string, baritone or unusual layouts, confirm the actual covered span and mechanical clearance. A device must work at the required fret, not merely close near the nut.
Sources: G7th: classical fit and removing the capo when not in use; Shubb: string span, opening, radius and pressure are separate fit checks
A practical capo buying checklist
| Capo trial record | Write down |
|---|---|
| Instrument and device | Guitar model; string set/tuning; capo model and mechanism |
| Position and fit | Fret; outer-string span; bar coverage; opening/neck clearance |
| Application | Placement; pressure setting if available; any sideways movement |
| Sound and pitch | Intended notes; tuner reference; repeated sustained readings; actual chord result |
| One change | Release/refit or permitted pressure change; repeat the same notes |
This is a proposed owner record, not a comparison we performed. Try the actual guitar whenever possible. A demonstration on another neck shows the mechanism but cannot certify your fit. Confirm compatibility or return arrangements for an unusual instrument before purchasing.
When this advice changes
Use the instructions for the exact instrument and accessory where a nonstandard layout, unusual finish or partial capo changes the assumptions. G7th’s FAQ recommends removing its capo when it is not in use and discusses possible finish reactions from rubber-processing additives. Its material statement does not certify every pad or every guitar finish.
Release the device before moving it along the neck or storing the guitar. Check the instrument maker’s care guidance and stop if a pad or edge marks the surface. A guitar with persistent tuning trouble or structural symptoms needs assessment; additional clamp force is not a repair.
Sources: G7th: classical fit and removing the capo when not in use; Fender: check tuning before, during and after capo use
The right capo is the one that works on your neck
Start with the frets and strings you actually need to cover. Check span, curve and clearance, then install the capo without sideways string movement. Confirm sounding notes as well as familiar shapes. A short record of position, pressure and repeated pitch readings makes a fit problem easier to separate from an existing guitar setup issue.
Frequently asked questions
Where should a guitar capo be placed?
Set the padded bar parallel to and just behind the chosen fret wire on its headstock side. Cover the intended strings without dragging them sideways, and follow the model’s application and pressure instructions.
Should my capoed E string still read E on a tuner?
Only if E is the intended sounding note in that arrangement. In standard tuning, a full capo at fret 2 raises an open E to F♯. Check the capoed target notes in chromatic mode or a suitable capo mode rather than lowering every string back to its uncapoed note.
Why does my guitar sound sharp with a capo?
Placement, excess pressure and sideways movement can contribute. Release and refit the capo, check fit and adjustable pressure, then tune for the actual capoed performance. An existing nut or setup issue may still need inspection.
Can nut width alone tell me which capo fits?
No. Check the string span at the highest fret you will use, plus the neck width/depth, opening, bar contour and contact on that instrument. The neck and string span can be wider there than at the nut.
How this guide was prepared
We read Fender’s capo-function and tuning guidance, D’Addario’s placement/mechanism instructions, Shubb’s span/pressure FAQ and application guidance, and G7th’s classical-fit and finish-care FAQ. Named maker guidance is scoped to its claims and does not prove universal fit or comparative tuning performance. The transposition examples are note-name arithmetic for a conventional full capo; the owner record is a proposed method. We installed, played or measured no capo or guitar, assessed no finish and performed no human expert review. AI assistance was used for source comparison and language review. The new six-string plan schematic shows location, not force or a tested mechanism; the tuner display is a schematic, not a captured pitch reading.
Documentation checked .
Clarified sounding-note targets, including capo 2 E-to-F♯; separated string span from neck opening and nut width; linked placement/pressure claims to direct maker guidance; added a repeatable owner record and finish-care limits; replaced an unsupported real-photo claim with a placement schematic.
Sources and further reading
- Fender: capo function, mechanisms and partial capos
- Fender: check tuning before, during and after capo use
- D'Addario: placement and pressure for different capo mechanisms
- Shubb: string span, opening, radius and pressure are separate fit checks
- Shubb: direct placement behind the fret without sideways string movement
- G7th: classical fit and removing the capo when not in use